Nothing says Christmas more than a Christmas parol. Relish in the festivities by learning how to make your own DIY parol. If you’re interested in making a gorgeous Christmas parol DIY-style, you’ve come to the right place. So, what are you waiting for? It’s time to kick off this holiday season with a homemade parol!
Before starting on your DIY parol, make sure you have all the essential materials first. The last thing you want is to realize you’re missing a key item halfway through your masterpiece!
Prepare your parol DIY station
A chef never starts cooking without first setting up their cooking station to ensure they have all the necessary materials and tools. This rule of thumb also applies to making a homemade parol. When setting up your parol DIY-making station, ensure that you have the following:
- ✦
Bamboo or balsa wood sticks
- ✦
Glue gun or regular glue
- ✦
Plastic table cloth or tissue paper
- ✦
Rubber bands
- ✦
Scissors
Lay out all your materials on the floor and ensure that you have a large piece of scrap paper or an old newspaper to prevent glue spills. This will make clean-up much easier in that you can simply roll up the scrap paper afterwards and recycle it. If you want to know how to use that recycled paper later to make a homemade Christmas tree, check out our article on Christmas trees made out of recycled materials.
How to make your DIY parol
Once you have your materials and work station ready, you can follow these steps to create your own DIY Christmas parol.
Start by making the star formation with your sticks:
- 1
Take 10 sticks that are all cut the same length. Leave an eleventh stick to one side to make pegs from later.
- 2
Connect 2 sticks to make the points of the star. Secure themwith a rubber band.
- 3
Repeat the above step to make two sets of connected “v’s”.
- 4
Take the two sets of “v’s” and place one across the other to create an “A” shape.
- 5
Secure the bottom ends of the two sticks with a rubber band.
- 6
Finish your star by connecting both ends of a single stick to the open ends of the formation.
- 7
Tie off the ends with a rubber band.
Repeat this process to create another star and begin building your parole frame:
- 1
Lay the two stars on top of each other so that they are perfectly in line.
- 2
Connect them by securing rubber bands around each of the five points.
- 3
Cut five short pegs from the extra stick you kept behind when making the first star. Each peg must be the exact same length.
- 4
Insert the five pegs into each corner of the pentagon shape by carefully pulling apart the two stars.
- 5
Use hot-glue to firmly secure the pegs in place.
Now that you have the frame of your DIY parol, it’s time for the creative part: decorating!
- 1
Use a plastic table cloth or tissue paper to cover the parol but leave the sides uncovered.
- 2
Make the tail of your parol DIY-style by folding a large piece of tissue paper to make a triangle shape.
- 3
Continue folding until you form a small triangle.
- 4
Fold the top point of the triangle across to the opposite side.
- 5
Cut slits along the open side of your triangle.
- 6
Carefully open the triangle.
- 7
Take a separate piece of cardboard and cut out a small circle.
- 8
Make a slit in the middle of the circle and tie a piece of wire or string through it.
- 9
Place the circle inside the parol tail at the top point of the tissue paper fold. The wire should go through the top so that the tissue paper hangs down like a skirt.
- 10
Wrap the wire around the bottom of the star so that the tail hangs from the bottom point of the star.
- 11
Repeat these steps to make another parol tail to hang from the second bottom point of the star.
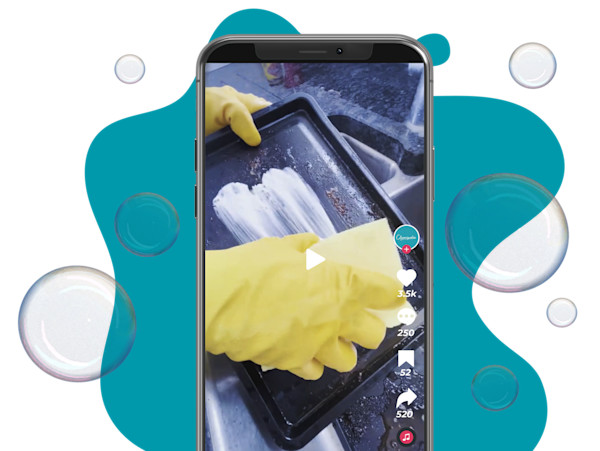
After your DIY Christmas parol is done, organize your scrap materials into separate piles. This will make it easy to know which materials you want to recycle, which you want to save, and which belong in the garbage. And if a bit of paint, sparkles, or glue made it on the table or the floor, be prepared with a good cleaning product (check out Cif).
If you want a Christmas parol, DIY is truly the best method for you and your family to get in the holiday spirit. Follow this helpful guide for step-by-step instructions on how to create your very own DIY parol. We guarantee that this will become a new holiday tradition that you and your family will enjoy for years to come. Happy holidays!
Do you want to learn which household cleaning tasks cause the most stress? Then read our Heated Household data analysis.