Filipinos spend an average of 10 hours and 2 minutes online per day, according to a global report. [1] Because of heavy computer use, your keyboard is bound to collect dust and grime. Unfortunately, no matter how much you keep food away from your desk, daily use can get computer peripherals dirty. So, it pays to know how to clean a keyboard.
Whether you have an external or laptop keyboard, this article is what you need. We’ll show you 7 easy steps to tidy up your computer keys.
Prepare Your Keyboard Cleaning Supplies
In most cases, you can complete the process using household cleaning supplies. However, you need to purchase additional items to ensure that you effectively get rid of dirt and bacteria. Here are the materials you need to prepare:
- 1
Soft-bristled brush
- 2
A can of compressed air
- 3
Cleaning slime
- 4
Cotton buds
- 5
Disinfecting alcohol
- 6
A cup of warm water
- 7
Powder detergent
- 8
Hand towel and microfiber cloth
Welcome to #CleanTok
The home of cleaning on TikTok. Brought to you by Cleanipedia.
Proud Supporter of #CleanTok
-
How to Clean an External Keyboard: 7 Simple Steps
If you have a wireless or wired external keyboard, follow the steps below:
-
1
Step 1: Disconnect the keyboard
Before cleaning your keyboard, make sure that it is disconnected from your computer. If you have a wireless keyboard, don’t forget to remove its batteries before proceeding to the next step.
-
2
Step 2: Sweep the dust off
Take your keyboard cleaning brush and remove the dust and crumbs. If you can’t find the brush we recommended, you can use a regular toothbrush. Remember to brush in between the keys and the underside. This way, you can get rid of any trapped dirt.
-
3
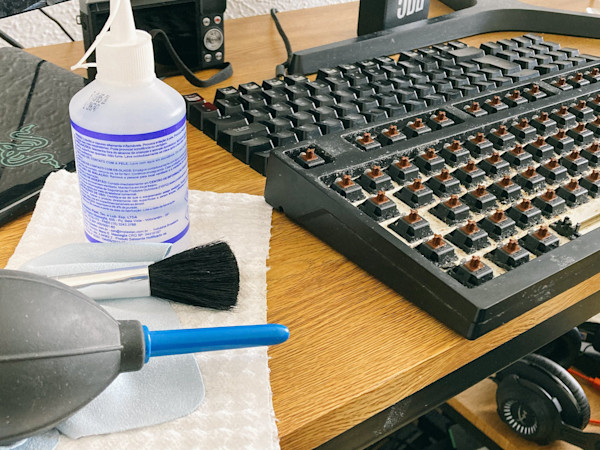
Step 3: Blow the dust off
Take a can of compressed air and angle the straw between the crevices. If you want to get the best results, remove the keytops before blowing the dust off. However, don’t forget to take a picture of your keyboard prior to this step. Otherwise, you may have trouble remembering where the keys should go.
-
4
Step 4: Use cleaning slime
To ensure that you’ve gotten rid of all the dirt, we recommend using cleaning slime in between the keys. However, if you don’t like the oily residue of the product, you can also slot a sticky note in between the gaps.
-
5
Step 5: Clean the keys
There are two ways to clean your keys:
Option 1: Use warm, soapy water
If you previously removed the keytops, you can wash them individually, in your cleaning solution. Mix two tablespoons of Surf powder detergent with warm water. Wash each keytop using a sponge and air dry them before reattaching.
Option 2: Use ethyl alcohol
If you don’t want to remove the keytops, you can also use cotton buds and Lifebuoy Ethyl Alcohol. Avoid drenching the cotton buds because doing so will make it difficult to clean the keys. Work your way around the keys and replace the buds once they get overly dirty.
-
6
Step 6: Clean the rest of the keyboard
Take your towel and dampen it with Lifebuoy Ethyl Alcohol. Use it to clean and disinfect the rest of your keyboard. This step is important to ensure that your keyboard is thoroughly clean and safe to use. After all, research has shown that computer keyboards can become breeding grounds for illness-causing bacteria. [2]
-
7
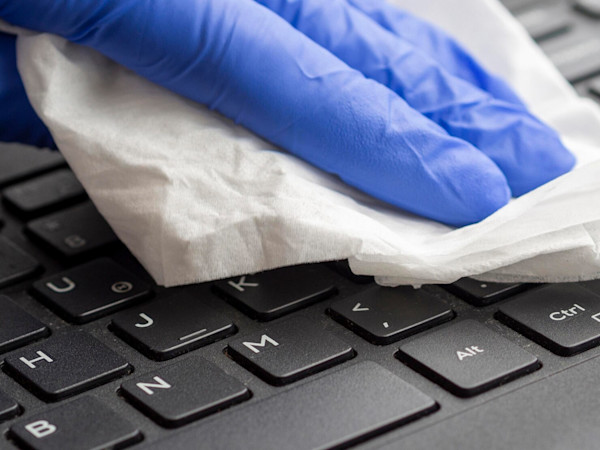
Step 7: Wipe your keyboard
To ensure that your keyboard is thoroughly dry, wipe its surface and underside using a microfiber cloth. Plug it back into your computer once you’re ready to use it.
-
-
How to Clean a Keyboard: 7 Steps for Laptop Users
If you’re a laptop user, follow these instructions for cleaning a keyboard:
-
1
Step 1: Turn off your laptop
Make sure that your laptop is unplugged and powered off.
-
2
Step 2: Review your manual
To avoid invalidating your warranty, we advise reading your laptop manual to see the manufacturer-recommended cleaning instructions. If yours does not have specific cleaning methods, you can proceed to the next step.
-
3
Step 3: Get rid of loose debris
Open your laptop and carefully hold it upside down to allow the loose debris to fall off. Lightly tap your device, but avoid shaking it. Otherwise, you might lose grip.
-
4
Step 4: Blow away the remaining dust
Take your can of compressed air and spray in between the keys to remove the remaining dust. As you’re performing this step, avoid blowing directly on the keytops. Doing so could damage the electronic parts inside the keyboard.
-
5
Step 5: Remove visible dirt
For this step, you’ll need a cleaning brush or slime. Get rid of any remaining dirt or dust you see.
-
6
Step 6: Disinfect your keyboard
Dampen a towel with Lifebuoy Ethyl Alcohol or any bleach-free disinfectant solution. Run the towel over the keys. However, don’t forget to use light pressure when doing so.
-
7
Step 7: Wipe your keyboard
To ensure that your keyboard is thoroughly clean, dry, and shiny, wipe its surface using a microfiber cloth.
-
Cleaning a Keyboard Doesn’t Have to Be Difficult
Using the steps we shared in this article, you can easily get rid of dust, dirt, and bacteria. Remember to clean your keyboard at least once a week to keep it tidy and disinfected. For more cleaning tips, visit Cleanipedia’s blog!
References:
1. Dixon, E. (2019). People in the Philippines spend the most time online, global report finds. CNN. https://edition.cnn.com/2019/02/01/health/philippines-highest-internet-use-scli-intl/index.html
2. Messina, G., Quercioli, C., Burgassi, S., Nisticò, F., Lupoli, A., & Nante, N. (2011). How many bacteria live on the keyboard of your computer? American Journal of Infection Control, 39(7), 616–618. https://doi.org/10.1016/j.ajic.2010.12.023
FAQs on cleaning your keyboard
-
Q: Can I use alcohol wipes to clean my keyboard?
Yes, you can use alcohol wipes to remove dirt, grime, and dust off your keyboard. However, make sure that the product doesn’t contain bleach to avoid damaging your keycaps. -
Q: Is it safe to put keycaps in water?
Yes, it’s safe to put the keycaps in water. However, make sure to remove them from the keyboard before doing so. -
Q: Can you clean a keyboard without removing keys?
Yes, you can clean your keyboard without removing the keys. Some options include using a soft-bristled brush, cleaning slime, and compressed air.
