When we enter a room, the colour is often the first thing that catches our attention. A fresh coat of paint is the easiest way to change the look and feel of your space with minimal investment, but it needs to be done properly to achieve the right impact.
A key part of wall preparation before painting is choosing the right primer. Use water-based primers for drywall, and oil-based primers for panelled or water-stained walls.
1. How to prepare walls for painting: set up
First of all, clear your room of all furniture and decorations. If certain pieces of furniture are hard to move, make sure to cover them with plastic covers. Don’t neglect the floor either: use some old newspaper or covers to avoid any splashes of paint getting onto the floor.
Don’t forget the small details when preparing walls for painting either. Remove covers from plugs and protect them with tape, remove the ceiling fan (if you have one) and cover any knobs, buttons, switches, or dials with plastic covers or tape to avoid unwanted messes.
2. Wall preparation before painting
Once you’re done with clearing out your space, it’s time to create a perfect surface for your paint to glide on. If you’re not sure how to remove wallpaper that’s already on your walls, you can get rid of it by spraying it with a paper remover and rubbing with a paint scraper. Alternatively, water and a little dishwashing liquid or fabric softener can help soften the paper for removal, or you can use a wallpaper steamer.
If you’re removing wall tiles instead of wallpaper then you’ll need to use a hammer and chisel to gently tease them from the wall, and then remove as much hardened tile adhesive as you can. Make sure you put sheets down first to catch any debris, and wear thick gloves to protect you from broken shards and sharp edges. When tiles are removed, fill any imperfections in the wall with filler and sand down to achieve a flat, even finish.
Finally, you should give the whole wall a rub down with 80 grit sandpaper wrapped around a sanding block. This gives it a slightly rough surface, which helps the paint stick to it.
3. Finishing touches
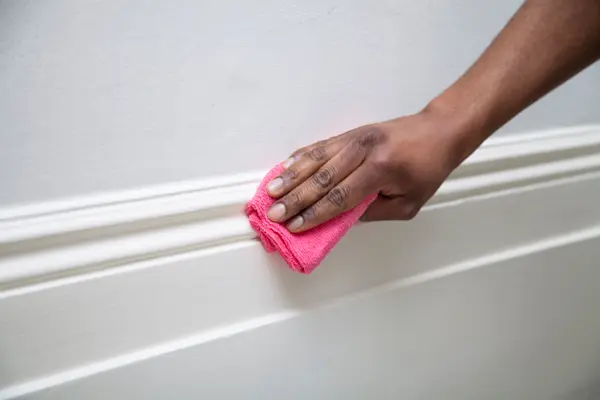
A final step in preparing walls for painting is to make sure all the surfaces are clean. Thoroughly vacuum every wall from the ceiling to the floor, paying close attention to the edges. Next, wipe the walls down with a damp rag. If you’re painting bathroom walls and they have a lot of oil and stains, use a suitable solution like Handy Andy for a thorough clean.
Just make sure to read the product’s instructions, wear protective gloves and always test it on a small area first before usage. Once done, prime the filled cracks and scratches with a good quality primer and you’re ready to paint! Good luck!
- ✦
Clear the room, cover large furniture, and protect fixtures and fittings.
- ✦
Begin removing wall tiles and wallpaper from the walls you want to paint
- ✦
Fill in scratches and imperfections with filler
- ✦
Vacuum or sweep up dust and loose debris
- ✦
Clean the walls with Handy Andy and a little water
- ✦
Apply a suitable primer to filled cracks, scratches, and marks
- ✦
Give your walls a coat or two of white paint if covering a dark colour
- ✦
Apply two coats of your chosen colour: let walls dry fully in between coats
